Rejuvenate your old clubs, save time, money and strokes off your score by changing worn golf grips yourself at home.
Disclaimer: Please note that some of the links below are affiliate links and I will earn a commission if you purchase through those links.

If you’re someone with a do-it-yourself mentality, the next time you need to have your golf clubs regripped consider doing it yourself.
It’s a relatively simple process that can save you time, money, and potentially strokes off your game by changing the old slick grips in your golf bag. I’ve swung golf clubs when fresh grips and clubs with worn grips and the differences in shots can be night and day.
With a worn grip one tends to grip harder on the club which can lead to a breakdown in mechanics and poor contact with the golf ball. Playing with fresh grips allows the golfer to lighten their grasp without concern for slippage in their hand, leading to more consistent shots.

Most regular golfers change their grips once a season and other more frequent golf change their grips several times a season depending on the amount of rounds played.
However, there’s no definite time frame for changing grips, however most recreational golfer change their grips once a season. If you but visual ques and feel will let you know that it’s time to make a change. Cracking, smoothness are the tell tale visual signs that a grip needs to be changed, however the control when swinging the club should be the deciding factor when making the decision to change grips.
Now that we’ve covered why and when to change your grips let’s discuss why you should do it yourself.
- Commute to the golf ship. At the price of gas steaily increases changing your grips at home is an attractive option for someone who doesn’t want to drag their clubs into a chain store or pro shop for service. Changing the grips in the confort of your own home, can save you on the time and money needed to travel to and from the re-gripper you choose.
- Save on labor . In addition to the price of gas to travel to your local golf store you’ll also have to consider the price of having the grips changed in addition to the actual cost of the grips. It can range between $3 and $5 per grip to change.
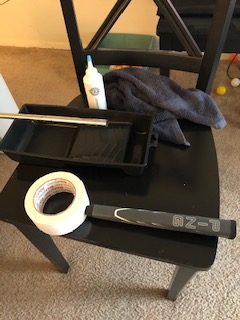
Supplies
- Hook knife
- Grip tape
- Grip solvent
- Painters tray
- Vice
- Shaft protector
- Cloth
- Grips
- Squirt bottle
- Table to secure vice
- Chair or stool to hold painter’s tray

Many of the items above can be purchased from Amazon.com which is another easy way to get the items need to change your grips without having to leave your house. I would suggest the re-gripping kit off amazon for $17 that included the hook knife, grip tape, grip solvent, squirt bottle, and shaft protector.

All the only other items needed are the painters tray, grips, vise, and towels.
Now that we have our tools let’s move on to the changing of the grips.
Remove the old grip
Using the hook knife, hold the club in one hand and work the knife down the club shaft away from you until you reach the end of the club.
With modest pressure this shouldn’t be hard of a task, it’s not necessary to cut through to the end of the shaft, however doing so makes removal easier.
After making the cut, again holding the club in one hand, pull the old grip off of the shaft, and recycle properly.
Removing and applying new grip tape
When you remove the old grip from the shaft a determination should be made if the grip tape needs to be changed.
The determining factor shouldn’t solely be if the old grip tape has lost it’s tackiness as with the application of new grip solvent and the drying process will make up for any lost adhesive from the tape chosen not to change.
What should be observed for is any lumps in the old tape during the previous changing of the grip that may lead to an uneven level to the grip tape. Additionally, adding new grip tape over the old tape will affect the diameter of the club shaft when the new grip is applied. This is significant if you’re a player that has the standard grip thickness and a larger grip would affect the swing mechanics.
If you prefer a larger grip and would like to fatten the grip more applying an additional layer of grip tape would assist if a larger grip were not available.
Once complete make sure there’s no remaining remnants of tape on the club shaft that would lead to unevenness when applying the new shaft.
Removing old grip tape
This is by far the most tedious part of the re-gripping process depending on how the grip tape was applied.

I have not found an easy way to remove the grip tape other than using consistent pressures when removing trying not to rip the tape in the removal process.
Sit down, and listen to a podcast, and it’ll ease the process considerably.
Applying new grip tape.
If you purchased the amazon kit, it comes with pre-cut lengths of grip tape to the standard grip length.
When applying the new grip tape be sure to leave about a half inch of over hang off the end of the club which will assist in applying the new shaft.
Apply the new tape starting where the grip tape ends 1/3 of the way down the club shaft, and make sure the tape is applied in a smooth manner to avoid bubbling which will also lead to unevenness when the new grip is installed.
After applying the tape the overhand at the end should be twisted and poked into the end of the club. This will help slide on the new grip when the time come is also prevents sand, dirt, and debris from getting into the club shaft and rattling around while using the club.

Installing the vise
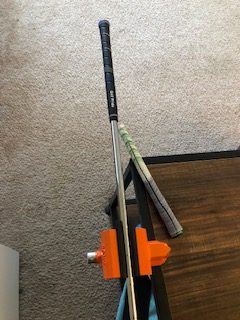
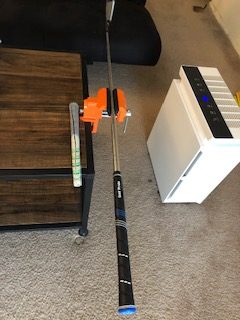
The vice should be secured to a firm structure like a table or counter, when a work bench isn’t available. However the table and chair used should be of similar height due to the need to coordinate the club being able to hover over the painter’s try during the grip application.
Installing the grip
Secure the club into the vise using the shaft protector included in the amazon regripping kit.
The grip solvent needs to be applied to the club shaft as well as the inside of the grip.
Using the squirt bottle apply grip solvent to the part of the shaft containing the grip tape making sure that the entire length of the tape is wet.
While over the painters tray, place one finger over the small hole at the end of grip, and quirt a liberal amount of grip solvent in the the grip. Place another finger over the larger hole and swish the solvent around the inside of the grip.
Position the end of the shaft with the small end over the shaft with the grip tape, and allow the solvent to drain onto the taped end of the shaft coating evenly the entire length of the grip tape. Use the cloth to wipe off any access solvent.
Position the grip label on the top of the club shaft in alignment with the face of the club, making sure that the grip is alinged, and slide the grip down the shaft making sure sure straight. Compare another fresh grip side by side with the newley applied to to make sure is isn’t stretched beyond the length of the fresh grip.
You’ll have a limited amount of time to adjust the grip before it become adhered to the club shaft.
While holding the club by the head give the end with the newly applied grip a few taps on the floor to make sure it’s completely on end of the club.
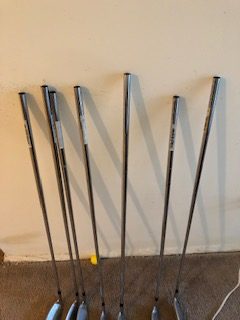
In roughly 45 minutes the club should be ready to play!


